Thursday, January 16, 2014

Girl Scout Kaper Chart

The Girl Scout Kaper Chart is a long standing tradition in any troop.  Originally designed to divide kitchen duties, now you can have a kaper chart for any division of work/responsibilities.

Kapers are most important when camping out.  These charts help divide the girls into patrols (smaller groups within the troop) and set them on tasks that both keep them busy and get things done around camp.  Camping Kapers can include campfire responsibilities, clean up, cooking, hostess, etc.

Troop meetings don't require campfire or cooking help, but there are responsibilities that the girls can share in to both foster cooperation and responsibility.


First you need to decide how many patrols (small groups) you will have.  Our troop has 16 girls so 4 patrols of 4 work out nicely.  Patrols with more than 5 girls tend to have workers and supervisors (kids that do all the work and kids that watch).  Be sure to keep patrols small so that each girl has a task to help complete the kaper responsibilities.

So here I have 4 patrol groups: Robins, Cardinals, Bluebirds and Chickadees.  Some troops allow the girls to name their patrols.  Because we are hoping to rotate who is in each group to be sure all the girls learn to work together the leaders chose the patrol names based on the troop crest (the Bluebird) that the girls selected at our fall meeting.

Next decide the things that need to be done at each meeting.  We have decide that the the girls should lead the pledge & promise, help with the activities the leaders have planned for that meeting, help serve snack, and help clean up the room.  Our troop is comprised of mostly 1st & 2nd grade girls so we are keeping our kapers simple for now.  As girls grow and mature you can have kapers such as attendance, badge secretary, dues collector, etc where single girls would rotate those responsibilities as well as complete patrol kapers.

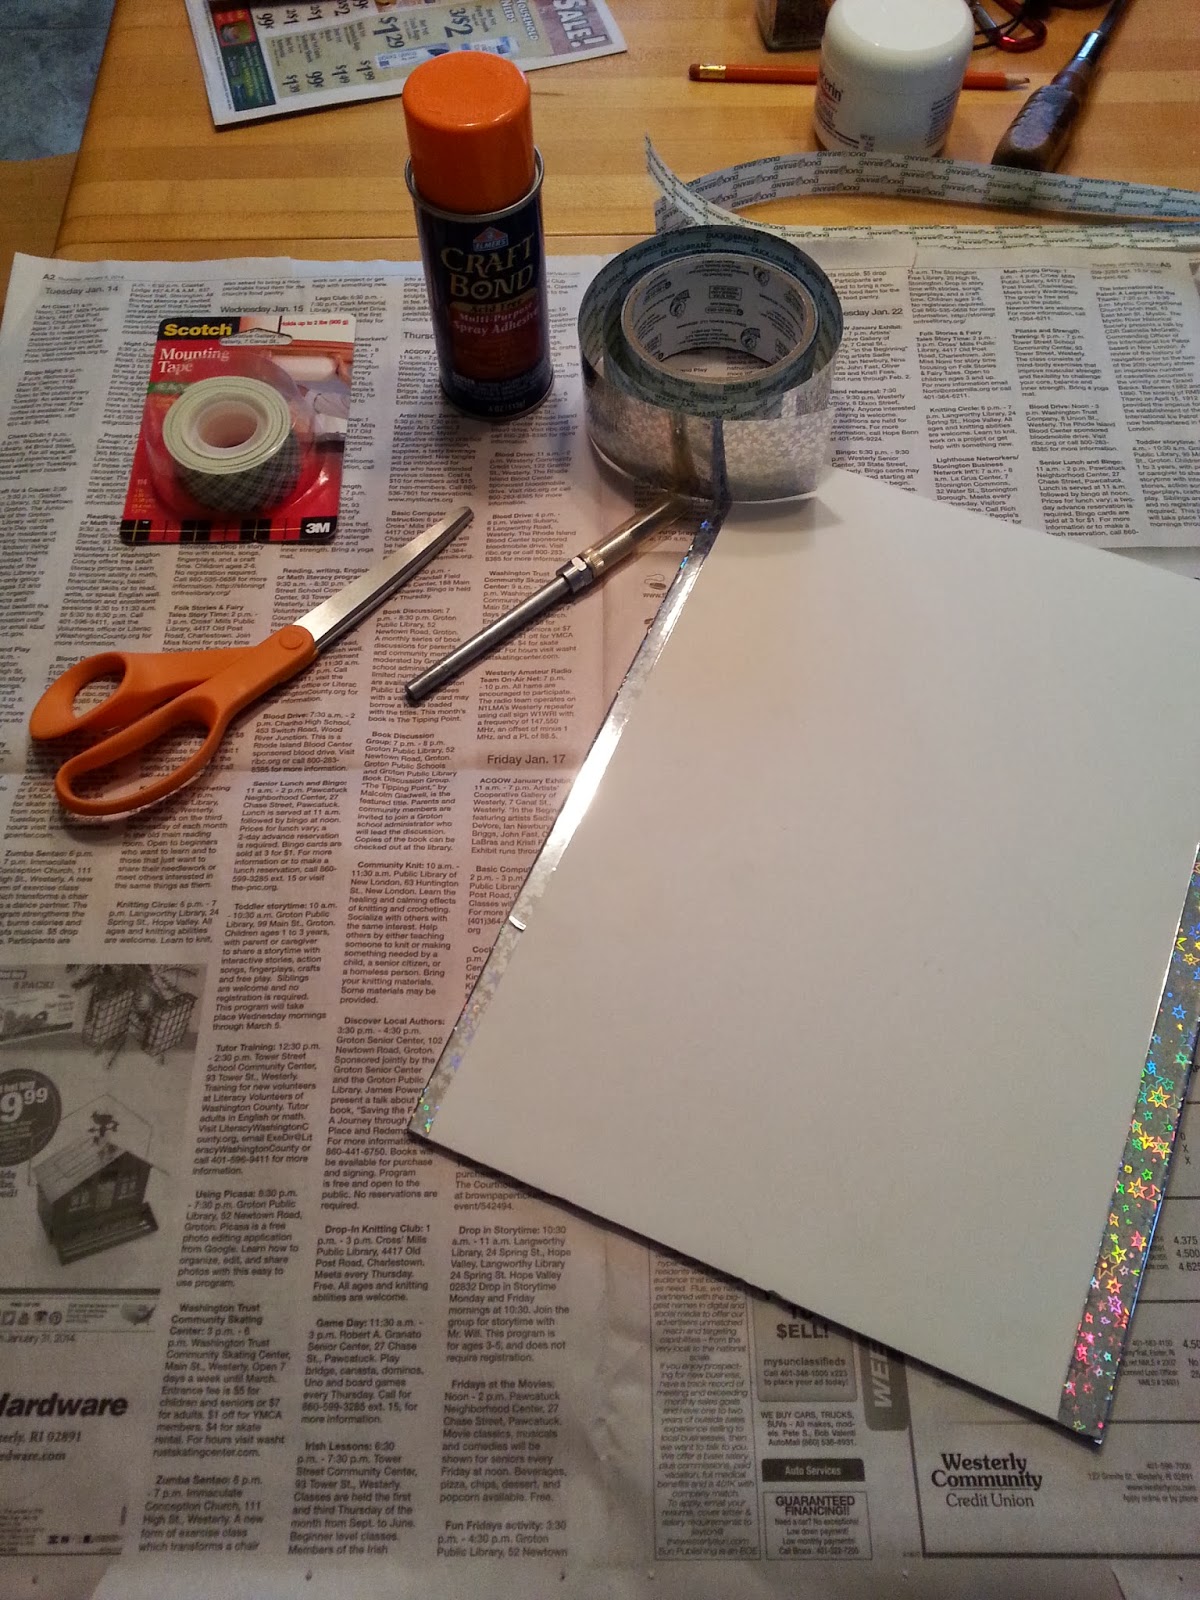
To make this type of kaper chart you'll need:
11"x14" foam board (I used 1/4 of a larger foamboard I had at home)
Scrapbooking paper (10 assorted sheets)
Double sided mounting tape
Spray glue
Ribbon or decorative duct tape
1 Office brad
Scissors
Wooden clothespins (one for each girl)
Sharpie marker

I was able to make this project just using things I had around the house.  Look as see what you have lying around.  Don't make a special trip for this stuff.  Be creative and use what you have.

After trimming the foam-board to the size I wanted I wrapped the cut edges with a designer duct tape.  I had holographic stars left over from my son's astronaut jet pack.  


Next I covered one side with a solid color scrapbook paper.  This will be where the patrols are labeled and the clothes pins with each girls name will be clipped so they know what patrol they are in.  (For each layer of this process I used spray-glue so the paper wouldn't get wet with liquid glue or fail to stick with glue sticks.)

Then I cut 4 pieces of decorative patterned scrap-booking paper to designate our 4 kaper responsibilities.

Next I made a four-colored wheel.  This will rotate allowing each patrol to change responsibilities each meeting.  Cardinals will be pink, Bluebirds are blue, Robins are yellow and Chickadees are purple.


Next step was placing two layers of double sided mounting tape.  I needed the wheel to stand up off the kaper chart just enough to make it easy to spin.  Here you can see the four kaper responsibilities are separated with a dark line and the mounting foam is in the middle.  I removed the final protective layer and placed a scrap of paper over the sticky part of the mounting tape so the wheel will rotate easily.


I used the computer to layout and print the names of the patrols, find small images of the birds for the wheel,  print out the kaper duties and assembled it all with spray glue.

Finally I took the wheel and kaper board and used a nail set to punch a hole through all the layers and attached the wheel with an office brad.

I'm looking forward to introducing this Girl Scout tradition of responsibility and cooperation to the girls at the next meeting.

When I finally figure out how to make our camping kaper chart I will be sure to share that here as well.

Happy Scouting!


Monday, December 23, 2013

Christmas Cookies

The recipe I finally found success with was by Wilton.  The original recipe calls for almond extract.  While this is a gorgeous nutty flavor, some may not care for it and when making it for nut-sensitive friends I modify the recipe.

1 cup (2 sticks) unsalted butter , softened
1 1/2 cups granulated sugar
1 egg
2 teaspoons pure vanilla extract
2 3/4 cups all-purpose flour

I also don't put salt in my cookies.  Some will say that this effects the rise on the cookies, but I have found that it isn't necessary.  Preheat your oven to 400F.  Gather un-greased cookie sheets.

Begin with room temperature butter.  Cream the butter and sugar together until they are just barely mixed.   I have found that if you over stir this step you add too much air to your batter and the cookies spread.  Mix in the egg and vanilla, again just stirring enough to incorporate.  Then add in the flour in small amounts.  Just before the mix comes together put your spoon aside and press the dough together with your hands.  This will help give the cookie a flaky consistency (like shortbread cookies).  Separate into two balls, this makes it more manageable once rolled out, you will need to use all the dough - it does not refrigerate well.  On a well floured surface and with a well floured rolling pin, roll out the dough until 1/4" thick.  Flour your shaped cutter of choice and cut dough.  Press together scraps and re-roll.  Bake cookies for 5 minutes.  Cool cookies.

Be sure to cool your cookies completely.  If they are even the least bit warm your icing will run off and make a huge mess.

Blissfully Domestic provided me with the most successful recipe for icing the cookies.  When making the "flooding" icing (the icing that covers the entire cookie) be sure to add VERY small amounts of water.   The icing should barely run off your spoon to flood.  I found that to coat the cookie but be thick and opaque you'll need to place some icing on the cookie and gently encourage the icing around the cookie with your spoon to fill it.  When I made the icing runny enough to "flow" on the cookie it was much too thin, and soaked into the cookie.  If you find that your icing is too runny using your sifter, sift in small spoonfuls of powdered sugar until it is back to the right consistency.  

For my Christmas cookies I lined in the same color as the fill using a thicker icing.  After flooding the cookies I left them to dry completely (about 20-30min).   

Snowmen:
  Black (thick: hat, eyes, mouth and buttons; thin:flood hat)
  Red (thick: scarf & holly berries
  Green (thick: scarf & holly leaves)
  Orange (VERY SMALL AMOUNT - thick, nose)
  White (thick: lining; thin: flooding)
  Snowflake candies

Snowflakes:
  White (thick: line out shape & accents; thin: flooding)
  Pale Blue (thick: accents)
  Blue sugar
  Snowflake candies
  Candy balls

Christmas Trees:
   Green (thick: line and accent; thin: flooding)
   Red (thick: garland & ornaments)
   White (thick: accents)
   Yellow (VERY SMALL AMOUNT - star tip for star)
   Red sugar 
   Candy balls
   Snowflake candies
   Assorted sprinkles

Candy Canes:
   Red (thick: accents)
   White (thick: line shape & accents; thin:flooding)
   Red sugar
   Crushed candy cane

Left to set (again about 20 min) and then boxed for storage.  Once the icing is set you can gently stack the cookies without having the icing transfer.  

Have fun, be creative and Merry Christmas!